Logistic Regression
로지스틱 회귀를 해보자.
#library
from pyspark.sql import SparkSession
from pyspark.ml import Pipeline
from pyspark.ml.classification import LogisticRegression
from pyspark.ml.feature import (VectorAssembler, VectorIndexer,
	OneHotEncoder, StringIndexer)


spark = SparkSession.builder.appName("logstic_reg").getOrCreate()
df = spark.sql("SELECT * FROM titanic_csv") #sql문으로도 데이터를 가져올 수 있음.
우선, 데이터 정보를 확인해보자.
(데이터 분석을 해보았다면 타이타닉 데이터는 익숙할 것이다.)
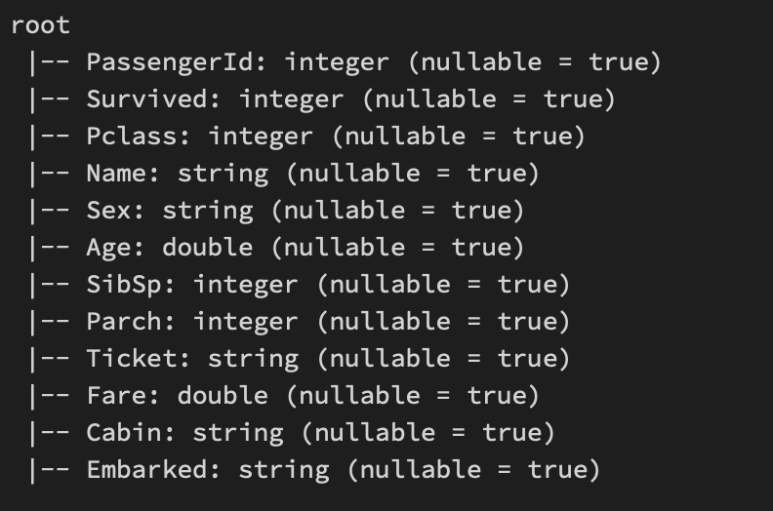
df.printSchema()사용할 컬럼만 가져오자.
my_cols = df.select(['Survived',
 'Pclass',
 'Sex',
 'Age',
 'SibSp',
 'Parch',
 'Fare',
 'Embarked'])
결측치를 없애보자.
my_final_data = my_cols.na.drop()
OneHotEncoder
범주형 변수를 숫자로 변환해준다.
범주형 변수들을 OneHotEncoder를 하기 위해선 인덱싱 처리를 하고 사용해야한다.
#변수명을 기억해두자.
#OneHotEncoder Process
gender_indexer = StringIndexer(inputCol='Sex',outputCol='SexIndex')
gender_encoder = OneHotEncoder(inputCol='SexIndex',outputCol='SexVec')

#OneHotEncoder Process
embark_indexer = StringIndexer(inputCol="Embarked",outputCol='EmbarkIndex')
embark_encoder = OneHotEncoder(inputCol='EmbarkIndex',outputCol='EmbarkVec')
사용할 독립변수들을 VectorAssembler로 묶어주자.
OneHotEncoding을 한 SexVec, EmbarVec를 묶어주어야 한다.
assembler = VectorAssembler(inputCols=['Pclass','SexVec','EmbarkVec','Age','SibSp',
                                      'Parch','Fare'], outputCol='features')
Pipeline
파이프라인을 설계하여 수월하게 과정을 처리할 수 있다.
#binary classification
log_reg_titanic = LogisticRegression(featureCol = 'features', labelCol = "Survived")

#pipeline
pipeline = Pipeline(stages = [gender_indexer, embark_indexer, gender_encoder, embark_encoder,
	assembler, log_reg_titanic])
Train Test Split
train_data, test_data = my_final_data.randomSplit([.7, .3])파이프라인을 사용하고 실제값과 예측값을 확인해보자.
test_data에는 Survived가 있기 때문에 이렇게 확인할 수 있는 것이다.

fit_model = pipeline.fit(train_data)
results = fit_model.transform(test_data)
results.select("Survived", "prediction").show()
Evaluation
이진 분류 평가지표를 활용할 수 있다.
약 79%의 정확도를 보여준다.

from pyspark.ml.evaluation import BinaryClassifcationEvaluator
my_eval = BinaryClassificationEvaluator(rawPredictionCol = "prediction", labelCol = "Survived")

AUC = my_eval.evaluate(results)
AUC
'Spark' 카테고리의 다른 글
| Spark - [Clustering] (0) | 2022.12.12 |
|---|---|
| Spark - [Tree Model] (0) | 2022.12.12 |
| Spark - [Regression Analysis] (2) | 2022.12.11 |
| Spark - Basic (0) | 2022.12.08 |
| Spark - [pyspark] (0) | 2022.12.08 |